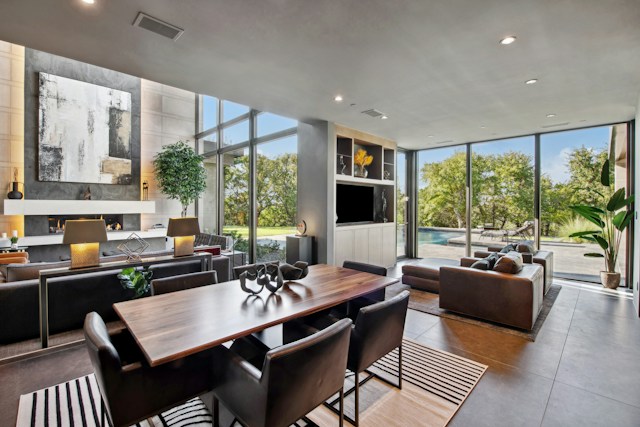

A sleek, organized entertainment center really is the heart of a modern living room. Forget those old days of a simple TV stand piled high with wires and remotes. Today, the media wall is where it’s at, offering a smart and integrated spot for your TV, sound system, and all your favorite decor. It’s way more than just furniture; it’s a built-in part of your home that instantly upgrades your whole space, blending high-tech function with high-end style.
Making the perfect media wall means thinking things through, right from the first sketch to the final lighting touches. When you get it right, it becomes a stunning centerpiece that tidies up your tech and shows off your personal flair. This guide will walk you through the key steps to design and build a media wall that not only handles all your entertainment needs but also makes your home look even better.
Planning Your Media Wall Layout
Before you even think about buying a single gadget or piece of wood, the most important thing is to plan out the layout. A media wall is a big deal, so its design should feel like it belongs and works well with the rest of your room. Start by measuring the wall you want to use. Think about the overall size: do you want the unit to stretch across the whole wall for a dramatic, built-in vibe, or should it be a smaller, more contained feature?
Next, consider how far away your main seating area is. This will help you figure out the best height for your television. A good rule of thumb is to have the middle of the screen at eye level when you’re sitting down. Once you’ve got the TV’s spot picked out, you can design the stuff around it. Will it be balanced, with shelves on both sides, or more uneven for a modern, dynamic feel? Try sketching out a few ideas. You might want to create a focal point that really grabs your attention, whether that’s the TV itself or something else like a built-in fireplace.
Your plan should also include all the devices you need to tuck away. Gaming consoles, streaming boxes, and sound systems all need a home. Decide if you prefer open shelves to show things off or closed cabinets to hide everything for a clean look. Planning carefully now means your finished media wall will be both beautiful and practical, giving all your entertainment gear a seamless home. There are tons of media room ideas out there that can help you picture what’s possible for your own space.
Choosing the Right Components
With a layout in mind, you can start picking out the main pieces. The television is definitely the star of the show, so choosing it wisely is important. Your TV’s size should fit both the media wall and the room itself. A common mistake is picking a TV that’s either too big or too small, which can throw off the whole design. Use your planned viewing distance to find the ideal screen size for a really immersive yet comfy experience. Beyond size, think about the tech; OLED and QLED screens offer amazing picture quality that will make your media wall feel even more premium.
Next up, think about your sound. While modern TVs have decent built-in speakers, a dedicated sound system will seriously upgrade your viewing. A soundbar is a popular and space-saving choice that can sit neatly under the TV. For a truly integrated look, you might go for in-wall or in-ceiling speakers that practically disappear. If you’re a serious audio enthusiast, you’ll need to plan space in your cabinets for an AV receiver and other sound gear.
Finally, consider your storage and shelving. The materials you pick will really define your media wall’s style. Floating shelves can give a light, airy feel, while custom cabinets offer a more solid, built-in appearance. Think about mixing both to display decorative items while hiding away less attractive hardware. Just make sure any enclosed cabinets have good ventilation so your electronics don’t overheat.
The Allure of an Integrated Fire
To really turn your media wall from a simple TV unit into a luxurious centerpiece, think about adding one of the many available media wall electric fires. This one thing adds warmth, atmosphere, and a high-end feel that can anchor the whole room. Unlike old-school wood or gas fireplaces, electric models don’t need a chimney, venting, or complicated installation. That makes them a perfect fit for almost any media wall design.
They give you those cozy, flickering visuals of a real fire without any of the mess, upkeep, or safety worries. Lots of models even let you enjoy the flame effect without the heat, so you can create a welcoming vibe all year round. This flexibility is a huge plus for homeowners who want ambiance without changing their home’s temperature.
Adding a fire instantly creates a focal point and a feeling of sophisticated comfort. It turns movie nights into cozy, cinematic experiences and provides a beautiful, dynamic backdrop even when the TV is off. When you’re planning your layout, you can put the fire right below the TV for a classic, balanced look that’s both practical and visually striking. The combo of glowing flames and your favorite film creates an unbeatable entertainment setup.
Cable Management Best Practices
Nothing ruins the look of a sleek, modern media wall faster than a tangled mess of wires. Getting that clean, professional finish totally depends on smart cable management. The goal is to make all the wires for your TV, sound system, gaming consoles, and other devices completely vanish. Luckily, a custom media wall gives you the perfect chance to do this right from the start.
One of the best ways is to run cables behind the drywall. You can install special low-voltage boxes and conduits that create a hidden path for HDMI, speaker, and power cords to travel unseen from your components to your TV. If you’re not keen on cutting into your walls, you can use the media wall’s structure itself. Design it with a false back or hollow channels where wires can be tucked away.
For stuff stored in cabinets, drill holes in the back to pass cables through. Use a power strip mounted inside a cabinet to gather all your plugs in one spot, leaving just a single cord to run to the wall outlet. Here are a few more tips for neat cable management:
- Label your cables: Before you feed them through the wall or a conduit, put a label on both ends. This will save you a huge headache later if you need to troubleshoot or swap out a component.
- Use cable ties or sleeves: Bundle similar cables together to keep them tidy and prevent tangling behind the scenes.
- Plan for the future: While you’re at it, add an extra HDMI cable or two in the wall. This makes it easy to add a new device later without having to tear everything apart.
Properly hiding TV cables is the secret to a truly polished and professional-looking installation.
Lighting for Enhanced Viewing
The final touch that brings your whole media wall together is the lighting. The right lighting not only sets the mood but can also make your viewing experience better and reduce eye strain. Instead of just one harsh overhead light, aim for layered lighting that you can adjust for different activities.
A key trick for entertainment spaces is biased lighting. This means putting a soft, neutral light source behind your television screen. The gentle glow from behind the TV brightens the room, which helps reduce the strain on your eyes from looking at a bright screen in a dark space. It also makes the on-screen image look better, making blacks seem deeper and colors more vibrant. You can easily do this with affordable LED strips made specifically for this purpose.
Besides bias lighting, think about other kinds of ambient lighting for entertainment. Dimmable recessed lights in the ceiling can give you overall light that you can dim for movie night. Smart LED strips installed on shelves or inside coves in your media wall can add a dramatic, customizable flair. You can change their color and brightness with a remote or a smartphone app to match the mood of a film, a party, or a quiet evening in. Thoughtful lighting is what makes your media wall feel truly dynamic and immersive.
A well-designed media wall does more than just hold your TV; it completely changes your living space. It’s a project that mixes good looks with practicality, creating a feature that’s both a handy entertainment hub and a beautiful way to show off your personal style.
Image Credit: Unsplash